Followers
Sunday, October 17, 2010
BP 9 - Animoto
You can create 30 second videos for free or pay $250/year to have gobs of upgraded features unlocked for you: unlimited length, watermark-free, 1000s of free songs to use, etc.
To create a video, simply upload your pictures or link your pictures from facebook, flickr, or a few other choices. You are also free to add video and music. If you don’t have music or if you need some additional pictures to fill in any gaps, Animoto provides a small library for free users. Of course, professional users get even more goodies, but that comes at a price.
Once your photos are linked or uploaded, Animoto allows you to add text and spotlight particular pictures. Let’s say there is one specific picture that you want to have a little something special. Animoto is sure to make that photo or video stand out above everything else.
Don’t like the way the video turned out on the first go around, just use the “remix” feature. It takes all the same media and reorganizes it into a completely new rendition of your memories.
Once your video is created, Animoto gives you plenty of options for sending out your video. Embed it into your website or add it to youtube or smugmug. The choice is yours.
So visit www.animoto.com and try it for yourself.
Saturday, October 16, 2010
PE 3 - iWeb | over and above
AWESOME! I just learned this really cool trick to create a “splash screen” on an iWeb site. The best part--it is flippin easy to do! Essentially, you create a short video in iMovie. I’m talking 10 seconds or less. Also, export it in such a way that the file is relatively smallish (in the 3-5 MB range). Place the video on the screen and set it to autoplay. Remove the controls from the video and make sure it doesn’t loop. Finally, place a box completely overtop of the movie, make it a link to your “home page”, and fill in the box with white (but bringthe opacity all the way down to 0%). Now you’ll have a “splash screen” that is hyperlinked to your home page. BRILLIANT!


Thursday, October 14, 2010
PE 2 - iWeb | over and above
So here’s the next thing… Essentially I’m trying to create a drop-down menu that will work on iWeb. Again, I had to go to another site, Pure CSS, for the menu to be created. Once created, I downloaded it and saved it to the website folder, similar to the dock.
Here it is on the website:

Wednesday, October 13, 2010
PE 1 - iWeb | over and above
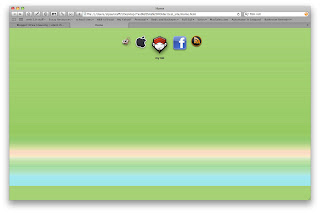
Here’s how I created a dock:
First, I downloaded the css file from ndesign-studio.com. Once I downloaded the file, and followed their instructions for posting it to my site, it looked like this:

Then I opened the .html files and chose new images for the icons by editing the .html with dashcode. Once I added the new images, it looked like this:

After adding icons, you can change a lot of different features of the dock.
- Transparent Background
- Shadows
- Depth of Magnification
- Font
- URL Link
- ETC